

- Alan Truman
- Albert Harrison
- Ambrose O'Halloran
- Andrew Hall
- Bob Chapman
- Bob Neill
- Clive Brooks
- Colin Fishwick
- David Lowe
- David Springett
- Gary Rance
- George Bell
- Gerry Marlow
- Ian Clarkson
- Joe Laird
- Joey Richardson
- John Berkeley
- Ken Allen
- Les Thorne
- Margaret Garrard
- Mark & Lisa Raby
- Mark Baker
- Mark Hancock
- Martin Pidgen
- Mick Hanbury
- Nick Agar
- Nick Arnull
- Nikos Siragas
- Paul Jones
- Phil Irons
- Philip Greenwood
- Peter Berry
- Peter Wood
- Richard Findlay
- Robin Wood
- Russell Kebble
- Sarah Thirlwell
- Simon Hope
- Simon Whitehead
- Steve Wright
- Stuart King
- Sue Harker
- SWC Club Members
- Tony Wilson
- Tracy Owen
- Walt Claxton
- Walt Claxton & Tom Allison
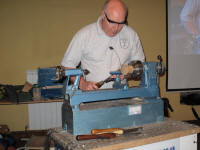
Bob Chapman 13 May 2010
Bob is an old favourite of the club and we can always be sure of
an interesting demonstration when he comes along. This evening was no
exception as he turned three small but interesting items.![]()
1. Spinning top box
Bob mounted a block of oak measuring approx. 60mm square in the chuck
and turned it to a cylinder, using a bowl gouge with the flute pointed
at 2 o’clock. Using a skew chisel he turned a
 dovetail spigot which
he then used to remount it in the chuck. He tidied up the outside, faced
off the end and turned another dovetail spigot with the skew chisel.
He took a measurement 15mm from the end and parted it off to turn it
into the box lid. (See photo BOB_01).
dovetail spigot which
he then used to remount it in the chuck. He tidied up the outside, faced
off the end and turned another dovetail spigot with the skew chisel.
He took a measurement 15mm from the end and parted it off to turn it
into the box lid. (See photo BOB_01).
Using a spindle gouge Bob ‘drilled’ a hole in the end of the wood
to the desired depth of the box then, with the flute at about 10 o’clock
he turned the inside of the box, turning a curve in the bottom to make
it easier to get things out of it. He finished turning it with a round
scraper, starting at the bottom and drawing it up the side, then he
sanded it down to 400 grit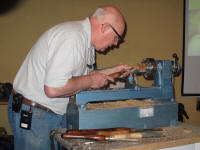 and finished it with cellulose sanding sealer.
Using a parting tool he turned a small lip on the inside, going in
approx.
3mm; this was for the lid to fit into. Bob took this off the lathe after
first marking its position in the jaws so he could remount it later.
(See photos BOB_02 & 03).
and finished it with cellulose sanding sealer.
Using a parting tool he turned a small lip on the inside, going in
approx.
3mm; this was for the lid to fit into. Bob took this off the lathe after
first marking its position in the jaws so he could remount it later.
(See photos BOB_02 & 03).
Next he mounted the lid in the jaws, using the spigot he had made earlier and, using a round scraper which was very sharp, he turned the inside of it to the shape of a spinning top with a small point. He sanded it and finished it, as before, with cellulose sanding sealer applying a thin coating of sanding sealer with a piece of kitchen paper, with the lathe stopped, then buffed it with the lathe running. (See photo BOB_04). He then polished it with a thin coat of beeswax followed by a thin coat of carnauba wax and buffed it with a cloth, pressing hard enough to melt the waxes and give a good shine. Using a parting tool he carefully removed timber from the edge of the lid to make it fit inside the box but unfortunately he turned away a fraction too much and so was able to give us a master class in how to continue with the project, with the aid of a piece of kitchen roll, in spite of the lid being a little bit loose. Bob’s wife Linda says she prefers lids to be a bit loose as they are easier to get off, so for the rest of the demo this was known as a ‘Linda lid’!
Bob re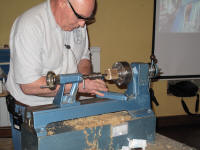 mounted the box in the chuck, taking care to match the reference
marks he had made earlier to the jaws and with the aid of some kitchen
roll he fitted the lid into the box and turned the top of it. He drilled
a short 6mm hole in the centre to take the spindle, taking care not
to drill too far and come through the other side. He removed the chuck
from the lathe with the work still mounted in it and replaced it with
another chuck which had long nosed jaws and mounted a small length of
ebony in it. He turned a small spigot on the end of this to fit in the
hole on the lid then turned it to a small cylinder. (See photo BOB_05).
mounted the box in the chuck, taking care to match the reference
marks he had made earlier to the jaws and with the aid of some kitchen
roll he fitted the lid into the box and turned the top of it. He drilled
a short 6mm hole in the centre to take the spindle, taking care not
to drill too far and come through the other side. He removed the chuck
from the lathe with the work still mounted in it and replaced it with
another chuck which had long nosed jaws and mounted a small length of
ebony in it. He turned a small spigot on the end of this to fit in the
hole on the lid then turned it to a small cylinder. (See photo BOB_05).
Again Bob remounted the box in the chuck and attached the spindle
to the lid with superglue, using a revolving cone to push it in place.
Once the glue had dried he shaped the spindle and blended it into the
lid, using the round scraper, working down until the lid was level with
the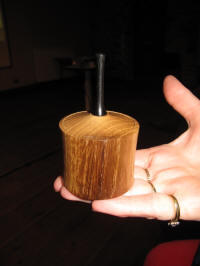 top of the box. He used a skew to turn a little groove under the
spindle where it meets the lid to hide the join, then finished it to
the right length. He sanded and finished it as before, stroking the
sanding sealer off the end of the spindle so he didn’t transfer any
black from the ebony onto the oak. (See photos BOB_06, 07 & 08).
top of the box. He used a skew to turn a little groove under the
spindle where it meets the lid to hide the join, then finished it to
the right length. He sanded and finished it as before, stroking the
sanding sealer off the end of the spindle so he didn’t transfer any
black from the ebony onto the oak. (See photos BOB_06, 07 & 08).
Finally Bob removed the box from the lathe, measured the length it needed to be to ensure he didn’t cut it too short, then turned it round and mounted it on pin jaws, holding it very lightly on the inside and using the tailstock to hold it in place. Using a bowl gouge and the scraper he refined the shape of the outside of the box to make a gentle curve towards the middle then used a bowl gouge to turn the base away, making it slightly concave. (See photos BOB_09 & 10 and BOB_11 for ‘one he made earlier’).
2. Off-Centre Egg Cup
For his second project Bob broke with tradition and turned an experimental piece - an off-centre egg cup. This was a another project that involved a lot of taking the work on and off the lathe. He took a piece of olive ash measuring approximately 85mm long by 80mm square and marked the centre at each end, then marked another point on each end approx. 10mm from the centre mark, which was on the same axis at each end. He mounted this between centres, on the centre markings, using a steb centre in the headstock. He turned it to a cylinder measuring approx. 75mm diameter then turned a deep spigot at the headstock end. He remounted it between centres, this time on the off-centre markings and turned another spigot at the end of the first one and about half its width. (See photos BOB_12 & 13).
Next he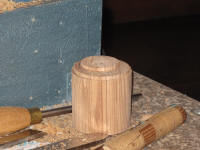 mounted it in a chuck, using the first spigot and tidied
the end to remove the hole caused by the live centre. Bob checked the
diameter of the piece (3”) and marked a line half of this measurement
(1½”) along the side of the piece then started turning a curve from
the end to this line. (See photos BOB_14 & 15). Then he took it off
the lathe and remounted it using the second, off-centre, spigot. He
marked the centre then marked a 45mm circle which he hollowed out using
the same techniques he had used when hollowing the box, taking care
not to go too deep to start with. He worked to a final depth of 27mm
and took care to ensure he had a nice even curve round the bottom then
sanded it inside and finished it with sanding sealer. (See photo BOB_16).
mounted it in a chuck, using the first spigot and tidied
the end to remove the hole caused by the live centre. Bob checked the
diameter of the piece (3”) and marked a line half of this measurement
(1½”) along the side of the piece then started turning a curve from
the end to this line. (See photos BOB_14 & 15). Then he took it off
the lathe and remounted it using the second, off-centre, spigot. He
marked the centre then marked a 45mm circle which he hollowed out using
the same techniques he had used when hollowing the box, taking care
not to go too deep to start with. He worked to a final depth of 27mm
and took care to ensure he had a nice even curve round the bottom then
sanded it inside and finished it with sanding sealer. (See photo BOB_16).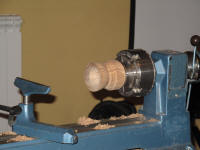
Again Bob took it off the lathe and remounted it on the central spigot. He sanded the top with sandpaper held in a block and treated it with sanding sealer, then continued shaping the outside , finishing it with a skew chisel to get a lovely smooth finish. He turned a foot then sanded and finished the outside and parted it off. (See photo BOB_17). To finish the underneath he mounted the top in Vicmarc multi size jaws with four small pieces of dowel placed as spacers to prevent the jaws from digging into the edge. Once he had finished it he buffed it using the ‘Beall Wood Buffing System’. (See photos BOB_18 & 19).
3. Urn Shaped Salt Pot with Stopper
For his final project of the evening Bob mounted a piece of idigbo (West African Hardwood) measuring 85mm long by 60mm square in the jaws, turned it to a cylinder then squared off the end. Bob was going to use a tapered cork for the stopper so he measured the dimension of the cork half way along its length and drilled a hole of this dimension and to the length he wanted inside, using a forstner bit. He turned the neck of the urn with a straight scraper, cutting downhill to make a cove shape then he reduced the size of the top and started to round over the shoulder. Using a parting tool he cut under the base then finished shaping the outside. (See photo BOB_20).
To hollow the inside Bob used a narrow scraper and a hook ended scraper
to get under the shoulder, holding it with a mole wrench to give him
extra support. He slid the tool in and out very careful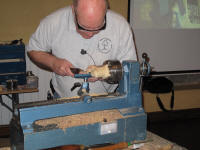 ly to ensure
he didn’t catch the sides. He drilled a 3mm hole through the shoulder
to pour the salt out of then refined the shape of the top, took a fine
cut round the shoulder to remove some tear out and refined the curve
at the base. (See photos BOB_21 & 22).
ly to ensure
he didn’t catch the sides. He drilled a 3mm hole through the shoulder
to pour the salt out of then refined the shape of the top, took a fine
cut round the shoulder to remove some tear out and refined the curve
at the base. (See photos BOB_21 & 22).
After ensuring all the shavings were removed from inside he finished
the salt pot as before then parted it off. He tidied the bottom using
a sanding disk mounted in the pin jaws then buffed it as before. (See
photo BOB_23).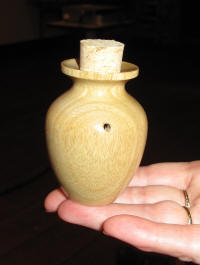
Bob explained that he makes a pepper pot to match but instead of the single pouring hole he uses a 1mm drill to make a central hole with six holes around it.
Summary
These were three very different projects all of which can be easily achieved at home and which I found very interesting. At the end of the evening Bob very kindly donated all the pieces he had made to the club, to sell in aid of St Luke’s Hospice, our charity of the year.
Lorrie Flannery![]()
SWC club member